
If you ever asked yourself “What can I do to help Bitcoin succeed?” this post is for you. The Bitcoin network is dependant on decentralization. Meaning we need for a lot of different people to hold a copy of the blockchain (Bitcoin’s “history book”) and make sure that transactions going into the next block are actually valid. Each computer that holds a full updated copy of the blockchain and is connected to the Bitcoin network is considered a node.
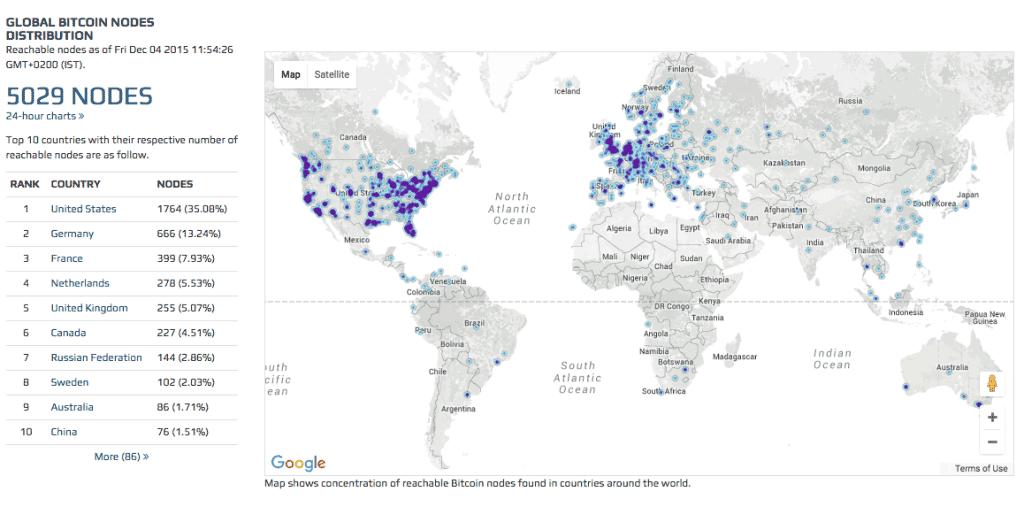
I won’t go into a detailed explanation about this in this post but this video will get you up to speed if you’re a complete newbie. As of today there are only 5000 reachable nodes on average running the Bitcoin network and that number has decreased dramatically since 2014.
Here are some of the reasons this number is decreasing:
- Running a node requires you take a sizeable chunk of your computers hard drive (around 50GB) and store the blockchain on it.
- It doesn’t pay you anything back, unlike mining Bitcoins for example.
- Many people prefer using lightweight wallets (also known as SPV wallets) so they aren’t required to download a full copy of the blockchain.
- The node software that is available today (i.e. Bitcoin Core) has a not very newbie friendly user interface. So even though the process of setting up a node is pretty easy (as you will see in a moment), the software can scare people away.
- Bitcoin has been stagnant for a pretty long time now and many people have lost interest in it. So nodes that were once active have been shut down.
You can help make Bitcoin better, robust and (even more) secure
So if you really want to chip in and “help Bitcoin” so to speak, you can just fire up a node at home. The process is pretty simple. Here are the initial requirements:
- Use a computer with at least 2GB of RAM and around 50GB of space for the copy of the blockchain
- Have a broadband Internet connection
- Make sure your connection is unmetered / with high upload limits / you regularly monitor the connection. to ensure it doesn’t exceed its upload limits.
- Keep the computer running and connected to the internet 24/7 (or at least 6 days a week)
It’s common for full nodes on high-speed connections to use 200 gigabytes upload or more a month. Download usage is around 20 gigabytes a month, plus around an additional 40 gigabytes the first time you start your node.
Even though this may sound like a lot to ask for, most computers today can handle these requirements pretty easily. The main issue will be the bandwidth the node will consume and this is something you should be aware of before hand. If you’re not sure I suggest you consult your Internet service provider.
If you don’t want to commit to these terms on your own computer you have two additional options to consider:
- Find an old laptop that you no longer use and turn it into a node.
- Install a node on a VPS (virtual private server). Meaning you rent out storage space from a company and install the node on their servers. The node will be functional 24/7 and you won’t need to take care of it (it also eliminates the need to store it in your home). We’ll even set this up for you free of charge (just keep on reading).
- Build a node on a Raspberry PI computer (complete instruction here).
Here at 99Bitcoins we run our own node on a VPS. The coins you get when you sign up are sent from this node and we consider this to be our small contribution to the Bitcoin network.
Some more things to consider before we start
First make sure Bitcoin is legal in your area. Second, make sure that you’re aware of your Internet upload and download limits so that your provider doesn’t slow your connection or shut you down unexpectedly.
So now I will show you detailed instructions on how to fire up your own personal node whether it’s on your own computer or on a VPS.
Install a node on your home computer
The following process is accompanied with screenshots from a Windows computer but is identical to a Mac computer as well. If you are having any difficulties with this process please contact us and we’ll try to do our best to help.
- Download the Bitcoin Core program to your computer
- Run the program and install Bitcoin Core on a drive that has at least 50GB to spare.
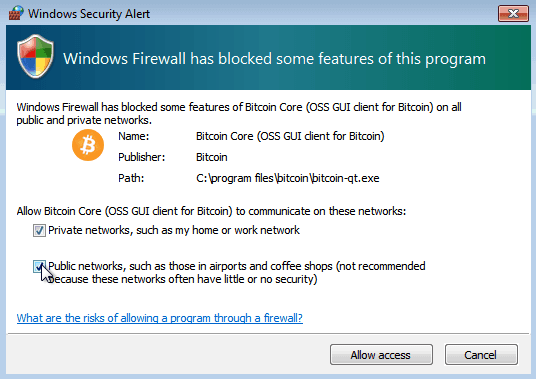
- Your firewall may block Bitcoin Core from making outbound connections. It’s safe to allow Bitcoin Core to use all networks.
Once you complete these step the Bitcoin Core software will start downloading a copy of the Blockchain to your computer. Since this is a big file it can take anywhere between a few hours to several days to complete. While downloading the program will show how updated it is at the bottom of the screen:
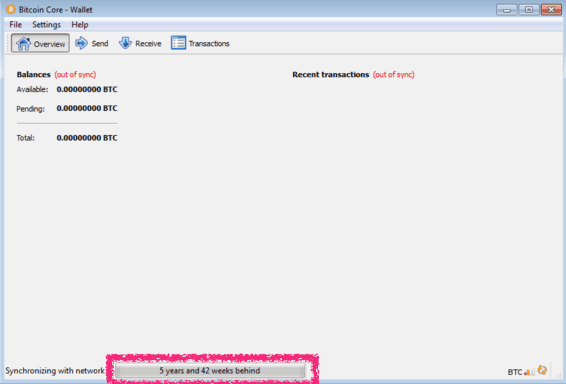
Keep in mind that this process will take a big chunk of your bandwidth and that you can stop it at any time by just closing the Bitcoin Core software. The next time you’ll resume the program it will continue from where it left off.
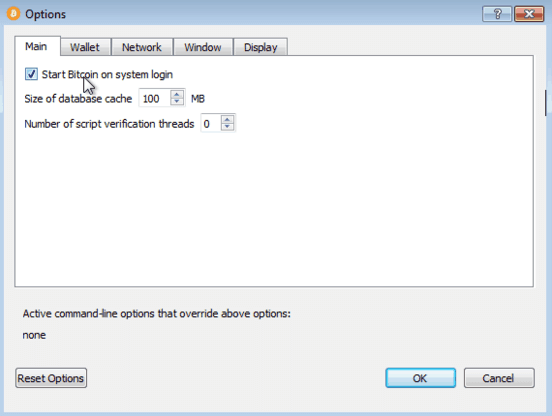
Finally in order to make sure that the node is operational as much as possible allow the program to launch whenever you login to your computer. To do this go to “settings” -> “Options”. On the “Main” tab click Start Bitcoin on system login and then Click the Ok button to save the new settings.
Configuring your network connection
Before we can say our node setup is complete we will need to configure our network connection to allow other nodes to communicate with our node. This step is relevant only if you’re setting up your node at home and not if you’re setting it up on a VPS.
The first thing you’ll want to do is see whether or not your router is already configured to accept inbound connections. You can use one of two options:
Option 1 – Check inbound connection through Bitcoin core
Open Bitcoin Core, wait about 30 minutes and then hover over the signal strength at the lower right side of the program. If it says you have more than 8 inbound connections* you’re good to go, if not – enable network connections as explained below.
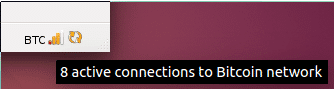
*In order to run a node you’ll need more than 8 connections. If you have less you can still use the program as a Bitcoin wallet but not as a node.
Option 2 – Check inbound connections through Bitnodes
fire up your Bitcoin Core program, wait about 10 minutes and then visit BitNodes’ page. Enter your IP address and click on “Check Node” (if you don’t know your IP address just type “what’s my ip” in Google).
If you get a green light you’re all set and there’s nothing more that needs to be done. If you get a red light you’ll need to enable network connections.
Enabling network connections
This is probably the most complex part of the process. For users who aren’t tech savvy I highly recommend contacting your Internet service provider’s support and ask them to help you configure your router to allow inbound connections to port 8333.
If you feel comfortable enough to configure this stuff yourself follow these steps. After you’ve finished continue to the firewall configuration.
Firewall configuration
You need to configure your computer’s firewall to allow connections to port 8333. For additional information for Windows, see the links below:
- Instructions for Windows Firewall
- Instructions for Norton Firewall
- Instructions for Mcafee Personal Firewall
Mac OS X comes with its firewall disabled by default, but if you have enabled it, see the section Allowing Specific Applications from the official Apple guide.
After you’ve done all of the steps above check your inbound connections again either through the Bitcoin Core program or Bitnodes’ testing tool.
Install a node on a VPS tutorial
Using a VPS to run a Bitcoin node will allow you to support the Bitcoin network 24/7 but it also has disadvantages:
- You will require some technical knowledge on how to run a VPS. If you don’t know how to run a VPS We’ll be happy to set this up for you at no extra cost (you’ll only need to pay for the VPS). Just contact us and let us know.
- It will cost you around $15/m to rent out a VPS with enough space on it (2GB of RAM and 50GB of storage).
If you feel you want to set up the VPS yourself here is a short Reddit post explaining the process.
Bitcoin needs your help
The main advantage Bitcoin has today over traditional payment methods is its decentralization. But if the the number of reachable nodes will continue to diminish, Bitcoin risks losing this advantage. If you want to help Bitcoin sustain its strength fire up a node today.
In This Article


Free Bitcoin Crash Course
- Enjoyed by over 100,000 students.
- One email a day, 7 days in a row.
- Short and educational, guaranteed!
Why you can trust 99Bitcoins
Established in 2013, 99Bitcoin’s team members have been crypto experts since Bitcoin’s Early days.
Weekly Research
100k+Monthly readers
Expert contributors
2000+Crypto Projects Reviewed